Welcome to the last part of my series “So, you got your Web application’s Home Page done, what about the Lotus Notes Client”. It has been a while since my last post and I apologize for that. It took some time to get settled with the new job and apartment.
Without further ado, lets finish the Notes Client home page:
In part 3, we created the outline we were going to use as well as adding the logo and title to the form. In this part, we’ll add the outline, some info text for the user and create the frameset to display the form.
Lets start with finishing up the form:
Form:
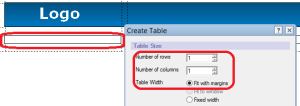
Select the second cell in the fourth row of the table. You could call it the left-hand navigation column. Create a new table within that cell: one row, one column and as the table width, select “Fit with margins”
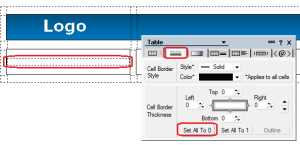
Select the newly created cell, open the table properties and remove the border:
Next we are going to set the background color for this row, like we did with the header in part 3:
Select the third tab in the table properties and as the first color, select the dark blue (or which colors you use) as the cell background. Then click the second “Style” button and select the lighter blue as the second color:

Note: You can use these colors anyway you like or however it fits your companies branding. Just be consistent and don’t use too many different colors. I usually don’t use more than between 3 – 4.
Next we add some descriptive text to the cell, so, switch to the text properties:

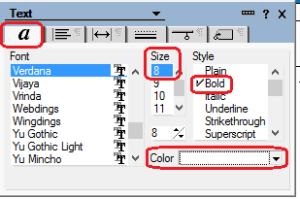
On the first tab, select a smaller font-size (I usually use 8), select “Bold” as the style and white as the text color:
On the second tab, set the alignment to middle:

Now type some text. I usually describe what a user can do here (view something, do something etc.), so, in this case I use “Actions…”. After all this, your form should now look something like this:

Now we are going to add the outline to the form. Position the cursor below the cell we just created, hit the enter button once and then select “Create – Embedded Element – Outline” from the menu:

From the dialog box, select the outline we had created in part 3 and click “OK”:

Now, the embedded outline doesn’t look very nice, so, we need to format it. Make sure the outline is selected and open the embedded outline properties. Do the following changes to the settings:
First Tab:

Second Tab (text color for “Selected” and “Moused” is the color we added in part 2):

Third Tab (background color for “Selected” and “Moused” is the dark-blue color we added in part 2):
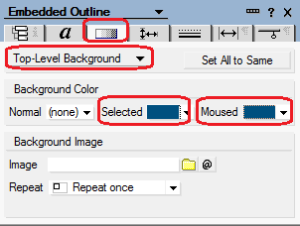
Fourth Tab:

Sixth Tab:
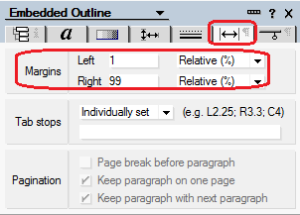
Save your changes and do a preview in Notes. Your form should look something like this now:

When you hover over the outline entries with your mouse, you’ll see that the background changes, as well as the text color and the image. Looks nice, doesn’t it?
We are almost done with the form. The only thing left is to add some info text. I usually add a computed text for the title, a horizontal rule with the theme colors and the text I want to display to the user within a one row, one column, fit-to-margin table. I set the minimum height of the row to about 4″, so, things won’t look too squeezed together:

Save your changes and preview the finished form in your Notes client. Mine usually looks something like this:

Frameset:
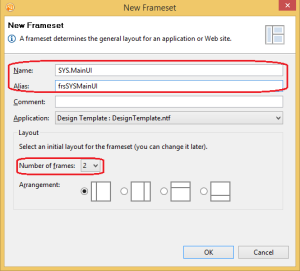
Next, lets create the frameset. Go to the Frameset section in the designer and click on “New Framset”. Give your frameset a name (I name mine SYS.MainUI and as the alias I use frsSYSMainUI), select 2 for the number of frames. We don’t worry about the arrangement of the frames. Once you are done, click “OK”
In the frame design window, select one of the two frames and delete it:

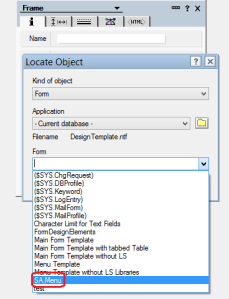
Open the properties for the remaining frame. As the content type, select “Named Element” and “Form”, then click on the button with the folder icon:

In the dialog box, select the form we just created:
Save and close the frameset.
Database Settings:
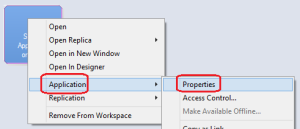
The last step is to adjust the start-up settings of your database. Locate the tile of your application, click on it with your right mouse button and then select “Application – Properties” (or “Database – Properties” in Notes versions older than Notes 8):
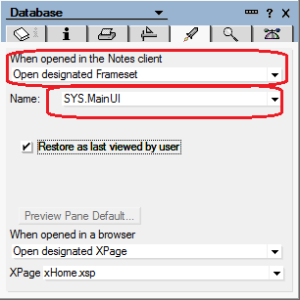
Click on the properties tab “Launch” (fifth tab) and select the following options for “When opened in the Notes client”:
And that is it. Now your users have a nice menu at hand, that informs them that the application is (now) a web application and they are also able to launch it in the browser right away.
Enjoy!


I created a while ago a project on OpenNTF for a starter template to quickly have a Notes app up and running:
http://www.openntf.org/main.nsf/project.xsp?r=project/AppDev%20Template
I tried to follow the User experience guidelines for IBM Lotus rich client applications and plug-ins as much as possible for Notes 7 clients…
Thank you for sharing Patrick.